 The next step of course was to go and buy the paper/card for the matting and layering. We had plenty of white card stock for the base, but the orange and green we needed to get. Of course I had to calculate how much I would need. I managed to get that wrong and overbought slightly. No worries, though, it will get used and it is good to have some spare just in case.
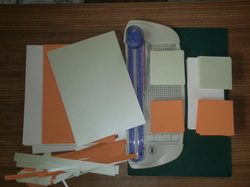
I was unsure at first what weight I would need, as it needs to be able to stand up on its own a bit. Thankfully in the shop we could touch and feel plenty of examples, and ended up with this simple, ever so slightly striped orange, and a gentle minty green with satin type finish.
Then came the first joy of cutting everything to size. I used the very simple cutting board I have, and did it sheet by sheet. It is meant to be able take several sheets at once, but I wouldn't take the risk. To make things easier, I only measured once on the base card. That happened luckily to match one of the lines on the board. From then on I just put every sheet of white card against that line. Then this is what I did for all the rest: each layer of the matting is one square smaller as on my cutting board than the one before. I needed 50 'large' ones of each colour (one square less than the white base), and 50 'smaller' ones (a square less again). That way instead of measuring anything all I had to do was line up aainst a particular line on the cutting board. Since for the easle everything is square anyway, it worked in all directions.
It was a bit labour intensive, but I managed to do all this sat back in the recliner chair, with my craft mat and cutting board on my lap and a table next to me.
You'll notice the strips of coloured paper that were left over. I kept them to make paper chains.
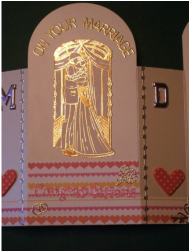
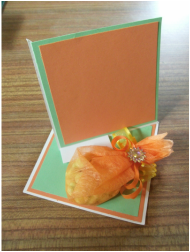 It has been a while since I have been able to blog. I have been busy trying to make fifty cards for my little boy's Spring Fest, and have been unwell due to trying out new medication, which my body is still adjusting to. The Spring Fest is part of our tradition. It celebrates the milestone when the child gets to primary school, learns to read and write etc... The catholic people here celebrate it with First Communion, and Spring Fest seems to have been invented so the others wouldn't feel left out. We were just going to have a party for him, without any doctrine attached, but one weekend he was in floods of tears all of a sudden. He wanted to take part in the Spring Fest, because of the play he could then take part in. So we gave him a note for the teacher, who said he could still join in and all was well. It's just two weeks to go now. Traditionally with communions and these fests, the children have memento cards, with their name and the date on to hand out. It used to be with a little prayer or poem, and a nice picture of flowers or angels, bookmark style. More and more it has became in to have a photograph of the child, and just name and date. Also the shape changed over time. The rectangular ones are less common now, as more people opt for square. It used to be a completely separate tradition to hand out sugarcoated chocolates and/or almonds at a birth. Of course clever sales people have managed to broaden that as much as possible, and now they are being handed out at almost any occasion. I knew I definitely wanted to make use of all of this to get my handmade cards out there. It took ages to decide what to do, as a few of my crafty friends can confirm as they really helped me to think it all out. First I was thinking of those boxcards, but I would have had to get other people involved - not quite the same, and it looked like it was going to work out rather above budget as well. Then suddenly I got the inspiration to go for a twisted easle, and integrate a little pouch with the chocolate beans in into it. First step of course was to make a mock-up. I intend to blog about every step, thinking that there must be other beginners out there, who might be interested to know how I fared making my very first batch of identical cards. I did learn a lot from making this, and am very glad I didn't go straight for the real thing! As it was just to try it out, the photograph is still missing, and there is just a white blank bit of card as a stopper. We do not like to put pictures of our child on the internet in any case. The stopper will have his name and the date on. One thing that became clear form making this, is that the pouch should be in a different direction. Because now, as you close the card and hold it the right way up as the photograph will be, the pouch will be upside down. So it will be turned around and lying flat aginst the bottom of the card as the easle stands up, so that it is upright when the card is closed. How to attach the pouch took some working out. Did you know that if you take high tack double sided tape, attach a ribbon to it, and then attempt to stick an embellishment on with gel glue it completely takes all the stick out of both the glue and the tape?! What a mess I got myself into learning that lesson! Anyway easily fixed all in all, attaching embellishments with more tape. So I am going to attach ribbon to the card with high tack tape, then loop another ribbon through the loops of the first ribbon, and tie that around the top of the pouch so as to close and attach it in one. It works well, and stays in place fantastically well. I just wanted to embellish the centre of the first ribbon, so that the card still looks complete and intact when the pouch is removed and people have scoffed their chocolates. Another thing that will be different is the colour of the bottom ribbon. That will now be green to match the colour of the card, and the green also returns in our boy's clothing for the day. In fact as all this took shape, we decided to go for an orange and green theme for the party. And guess what... He brought the tickets for the play he is taking part in home, and they are orange too! It was meant to be! Now then, as I have been working on all this, slow as I am, I have made hardly any other cards. And I so wanted to enter my friend Emma's Challenge, and I apologised to her that I would not be able to. But then the penny dropped... The theme this month is Chocolate! Of course, I could enter this card, as it has real chocolate incorporated in it. I only hope she will accept a mock-up card, as none of the real ones are finished yet - I am still at the matting and layering stage.
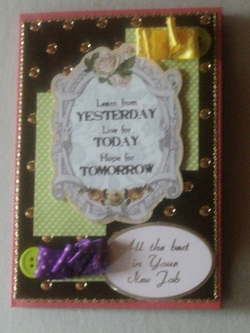 Meanwhile my other brother, the eldest, has just started a new job on Monday, after a really difficult time in his life. So I felt I ought to make him a card too. Again I looked for challenges first. If I am honest I don't feel as confident about this one, perhaps I tried to fit in with too many things. Ah, well, still learning... Sorry the picture has turned out a bit hazy. Using dotty cardstock was easy to decide, as I was pretty sure he would like that. There's two challenges that fits with: Craft Your Passion en The Poodle's Parlour. The first is asking for dots and (or) stripes, the other for spots and dots. Using the sentiments as the central focus was also pretty straight forward, especially as I happened to have just the right ones, from Hunky Dory again. You may have noticed I'm a bit of a fan... Lexi's Creations wants the focus on the sentiment this time, as does the Southern Girls Challenge with 'You got something you wanna say?' Then the question was how to embellish. With three challenges showing me the way towards ribbons, how could I refuse? But then I did want to make sure it stayed masculine enough, and was unsure which ribbons and colours to use. So I went for the ones that also had dots on them, to stick with that theme, and avoided bows. My husband assured me that it would definitely be ok for a man that way. So that's this card sorted for these three challenges: - Phindy's Place Challenge - 'Ribbon' - Whimsy Inspires - 'Use ribbon on your card' - Cupcake Craft Challenges - 'Sewing Box' For this last one I especially added the buttons as well... No, I'll be honest with you and let you into a secret. I boshed up with the ribbon and ended up with some high tack doublesided sticky tape on the end without ribbon on, so I stuck a button on for camouflage and then repeated this with the other ribbon. See what I mean about cards designing themselves... Now then, there is no glitter on this masculine card with dark brown card stock as background (with gold dots). That's three of the Desert Island Crafts list, as required. Whoops that's one more challenge than I had for my younger brother's birthday card. Good job he's not the jealous kind...
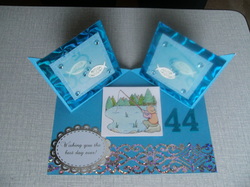 Tomorrow's my brother's birthday. Yes, you read that right: tomorrow. I actually made the card in time! I even had a look before I started to see if there were any challenges I could strive towards. And guess what - as luck would have it a couple have the theme 'Birthday Card': Timeless Tuesday (Happy birthday, Beate!) and Scrap Creations. And the 2 sisters have 'birthday fun' going. Then there is Cards for Men with the Great Outdoors, remember? Well, my brother as far as I am aware is a man, and I was thinking of making something for him incorporating his hobby of fishing. He has been fishing for very many years, since we were in our teens, and still seems to very much enjoy it. Thankfully my friend Fien had just sent me some really elegant fish, and I found a fishing scene in my stash. That made it relatively easy to fit in with the Pink Gem Challenge photo inspiration challenge. What a gorgeous gem to inspire my choice of blues for this card! 'Numbers' was relatively straightforward too, especially since I had those lovely aquamarine felt ones. It happens to be the theme at the Pixie Challenge from the Pixie Dust Studio. That leaves one much less obvious one, but since it was one of the first ones I came across during this search and one of the very first challenges I ever took part in, I wanted to keep it in. That is ' Sew it' at Do You Stack Up, which added a bit more of a true challenge in this case. I used one of the Hunky Dory sentiments which is nicely finished with silver faux stitching, complimenting the fish and water beautifully. Eventhough this card fits so many challenges, which would sometimes work so restricting, I am extremely happy with it. I wonder what you all think, and much prefer an honest answer, but I personally feel it is one of my best so far.
 It is rare for me to try my hand at 'clean and simple'. I find it very difficult, as there is so little to hide any mistakes behind. Usually a card kind of shapes itself by forcing me to cover something or other up. Well, this one kind of led itself to this result. I seem to be getting a bit better at working neatly and thinking things through before acting. Also I am starting to find it easier to comfortably say the job is done, it's ready. All this is a very good thing, since clean and simple is exactly the challenge set by One Stop Craft this week, which I would like to enter this into. I also wish to mention my friend Miet, as this card was made for her and her family as her grandmother passed away. I hope the sadness of their loss will be overshadowed by the joy of their memories as time progresses.
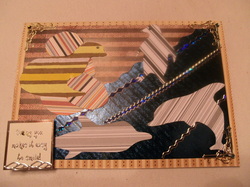 You wouldn't believe how much thought went into this card before I ever started making it. The theme Emma set for us in her challenge was stripes. I didn't want to do anything obvious, or just happen to use stripey background paper, so in the end I thought something a little more abstract and playful was in order. This is what I came up with, with a sentiment that original said: "Seeing you makes it easy to smile" where I changed the second e into an a. I would also like to enter the Top Tip Tuesday Challenge, the animal part of it, obviously. I don't think I am advanced enough yet to have any meaningful tips yet, but at least I can enter a card. Order of the Opus Gluei who throw challenges for fun, also happen to have an animal theme going. So here's to them too. And the great outdoors theme for Cards for Men this card should be good for as well. I have always considered browns, greys and darker blues to be masculin colours, and the stripes themselves as well, I guess they make me think of ties...
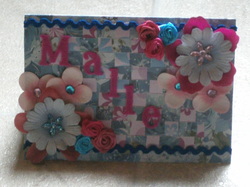 Phew! Ever since I heard the theme was floral I wanted to take part in the Crafty Blogger's Network Challenge. I had already missed a challenge for which I had made a card when our internet connection went off for nearly three weeks, and now that is fixed, the lead to my mini-laptop is broken. This means I am very limited in coming online again, as I normally do this lying down in bed, and now I have to come downstairs and sit at my husband's computer, which is very difficult for me. Anyway, this serves as a birthday card for my stepmother-in-law, who is called Malle. It is unusual for me to go this floral, another little step out of my comfort zone. I must say that zone is gradually growing, bit by bit. So, just before the deadline, I would very much like to enter this card in the challenge. When I do decide to make the effort to come downstairs, I have to make it worth my while. So I found another challenge I think this card would suit. Scrap Creations have one on the theme of flowers, so I am entering that one as well. Of course there's always anything goes as well. Use your stuff is one of those at the moment. This card fits their spirit as well. I was sent these flowers in one of the many crafty packets my facebook friends send me. I wanted to do them justice, but as I said before, it's been outside of that comfort zone for me. I was always worried I would end up making something very old fashioned and naff. The same goes for the blue floral paper, which was part of my hunky dory packet. By weaving it with the pink paper, and colour coordinating the flowers, I actually very much like the result. Make it Monday are experts on the anything goes theme, so this one os for them as well. Happy crafting!
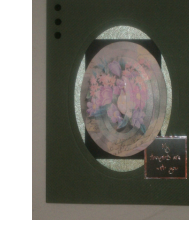
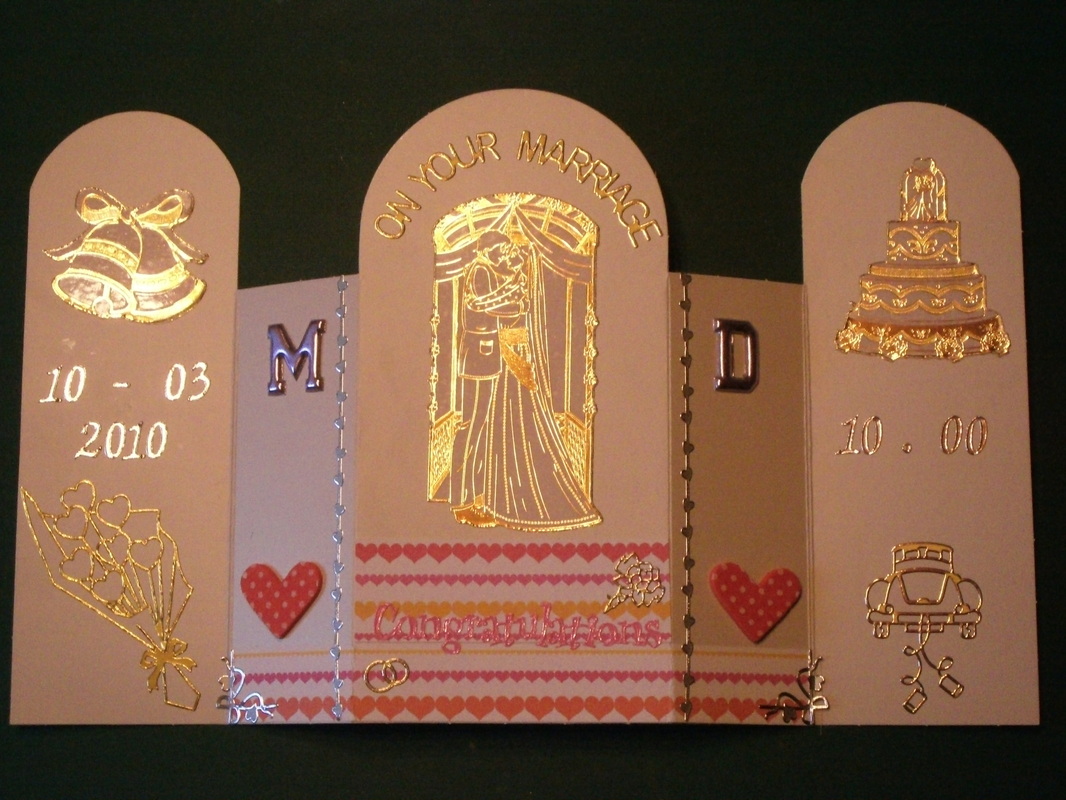
 It's been a while since I blogged here. That's largely due to the telecom company who saw fit to cut us off from the internet for what seemed like ages. It is amazing how much we had come to rely on the internet, and how much we missed it! Today is a very special day, as my cousin a few times removed (no idea how you're supposed to count that out) is getting married. We would have been at the wedding at the moment, if it weren't for our little boy getting an ear infection. He's coping well but very tired, and in no way up to celebrating, or being babysat. So in her and her husband's honour I am posting the card I made for them, and entering it in a few challenges. While I am at it I would like to thank Feline Playful for all the work they put in, making it so easy for me and many others to find these challenges. At Bunny Zoe's Crafts the theme is: 'Celebrations'. It couldn't work out better, could it? This shaped card from hunkydory fits nicely into this month's Hooked on Craft challenge of 'More than one fold', while it was absolutely perfect for the purpose of a wedding card as well. And then there's That Craft Place with 'Anything goes' while they relaunch early. So those are the three I am entering, to try and get back into the swing of things. I must say it did feel strange, and I had to push myself a bit to restart. Hopefully I'll be lucky.
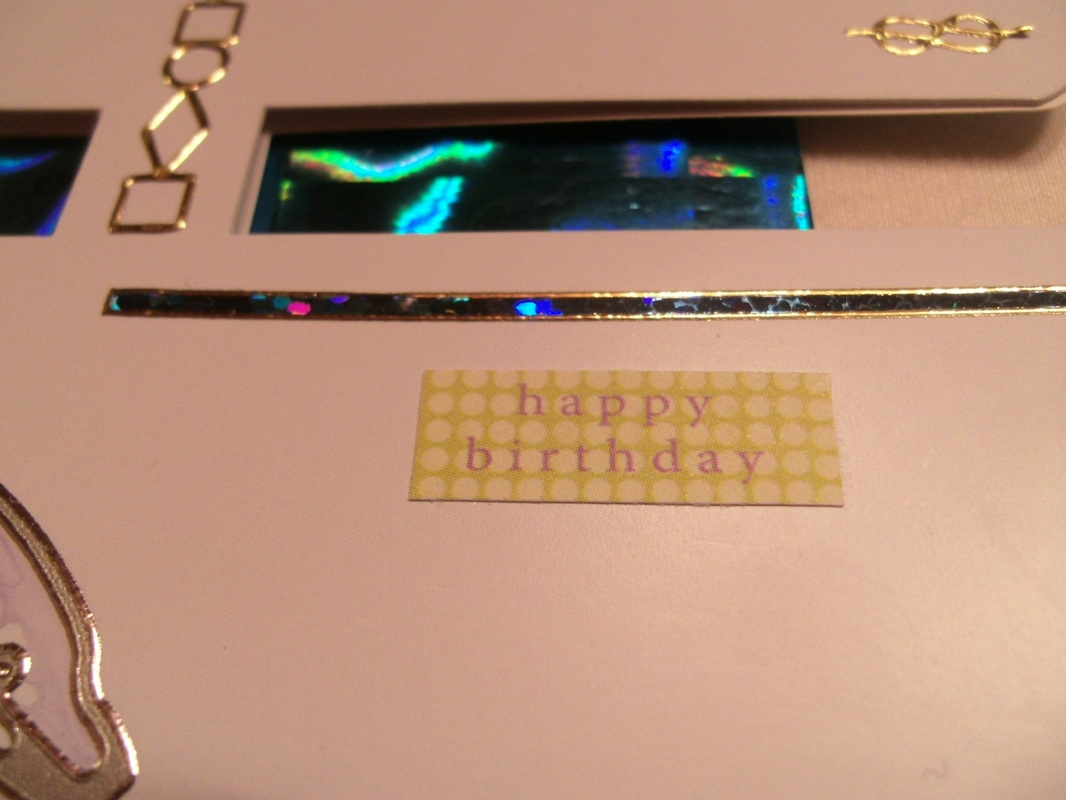
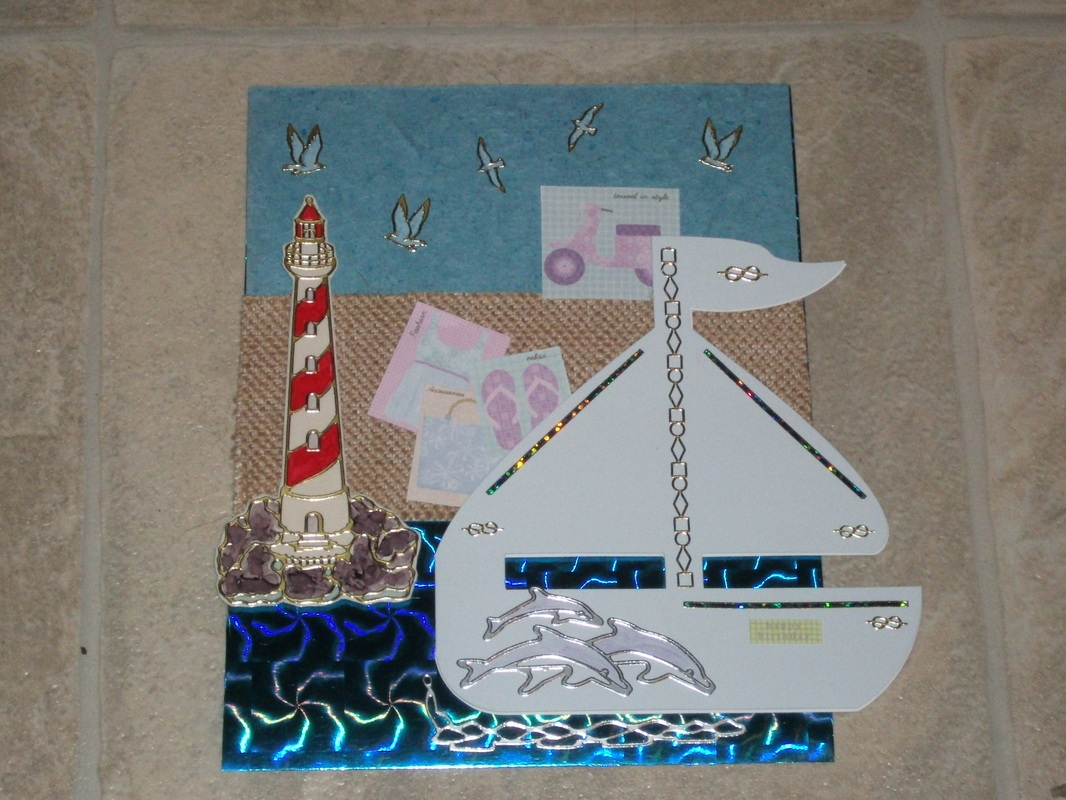
 When I saw the theme 'Oh, I do like to be beside the seaside' of That Craft Place I first thought that would be really easy. That day I had read several challenge blogs, and had gone through my stash and put stuff ready around various themes that appealed to me. I am used to taking one card at the time, and so after I had finished the first card, I was totally overwhelmed at the thought of all these other ones, I had complete crafter's block. It was clear I was going to use the boat - a base card from HunkyDory, but I started to think a boat is quite different from the seaside as such, and doubt crept in. The same happened for the other cards I had planned, and I was really dissatisfied as I went into the night. I lay awake pondering, and by morning this card was designed. It still took a while to get around to actually making it, but here it is. Since over at Quirky Crafts the theme is to build a scene, I thought this would fit perfectly as well, so I am entering their challenge too. I find these challenges really do stretch me, and make me learn at a much faster pace than I otherwise would. Some of you know how scared I was of using my Promarkers. Well, here's my second try. I particularly like the way I have been able to put in the textures of the rocks underneath the lighthouse. I wish I had taken a close-up of it now, might still add one later. I did post a close-up of the name of the boat: Happy Birthday, and for good reason. PanPastels have Happy Birthday as their theme. On the paper I cut the beach gear out of there was this tiny lettering with almost each picture, and this happy birthday one on its own. It is so small it could only be used as detail, and I pondered how I could do it to fit the scene. Using it like this on the boat seemed just perfect. If I would have any chance at all of winning this one, the prize of a PanPastel trial pack would be the perfect addition to my still tiny, but gradually growing, stash. One thing that was completely new to me was working outside of the base card. The boat is the only card that opens up, it is stuck on single card as background. It is a sign of slowly growing confidence that I have ventured into doing this. When I saw the 'Alter It' challenge at Lisa Somerville's I thought I would leave that one for what it was. And then I found myself making this card and thinking: 'Hey, that's altered.' So I went back to her blog to see if it would fit, and I feel I can safely say I created the card for the Bloggers Challenge Alter It Challenge.The Drunken Stampers are looking for new in a different way, using something that is new to your stash. Well, as I said the Promarkers are, but I did use them once before, just a teeny weeny bit. But the beach gear is from a 12X12 I was sent by a friend when I was recently in hospital. I did have some of those as backing paper, just floral or abstract. A lot of the ones she sent me were much more specific, and this is one of those. So I looked for different ways of using those as well. That should qualify this card for that challenge too.
You know what I said about the anything goes theme, it being so broad I would not know where to start. Well, there is another one on the go at Poodles Parlour. It looks as if there is an unwritten rule to use a digi stamp. That would be another first for me, I am building up to it, but nowhere on their site can I find any rule or information that says you have to, and I thought this card has brought so many different elements together it would suit the anything goes very well. So I hope this entry will be accepted.It is probably needless to say by now, but this card too is going to Jackie Newport's fund for Charmaine and Maddie, who live with cystic fibrosis. A facebook page will be set up soon to support this fund. I will pass on the link as soon as I have got it.
|

 RSS Feed